
Sidebar
Index
start:branch_admin:onlinebooking:createbooking_job
Create Booking/Job
In this tutorial I am going to show you how to create a booking /job.
YOU MUST HAVE COMPLETED YOUR Edit Settings AND Edit Staff BEFORE COMPLETING THIS PROCESS.
To begin click on the menu button located in the top left hand corner of your screen, followed by Branch Admin, followed by Booking System and then followed by Create Booking/Job
Once this screen has loaded you will be presented with 10 pieces of information to complete.
Before filling out the information is it important to note that the job number is automatically generated at the top of your page.
To begin simply enter the name of your customer. If you are editing the information of a pre-existing customer simply type their name and all of their information will appear.
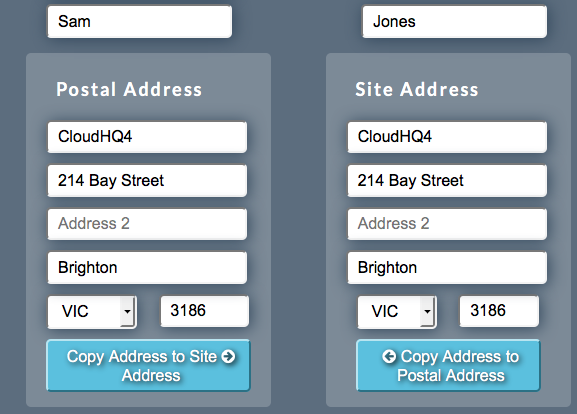
The next step is to enter the postal and site address. If these two addresses are the same simply fill out the information once and copy the information across to the corresponding section.
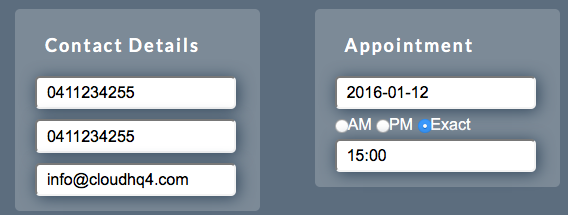
Moving down the page the next step is to enter the contact information for your customer with the option of adding their phone, mobile and email address.
Across to the rights you then have the option to enter the date and time of the appointment. When entering the date and time it is important to note that selecting AM or PM means that the job will go for the entire morning or afternoon however if you select an exact time the appointment will be set for 1 hour.
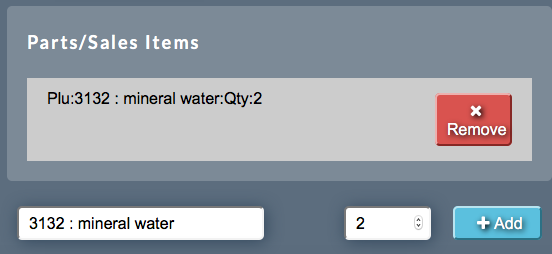
At the very bottom left hand corner of your page you will have the option to make a list of the parts used whilst on site. To add an item simply search for the product by name or by PLU code, add the quantity and then click add. This process can be completed as required with the option to delete the products if needed.
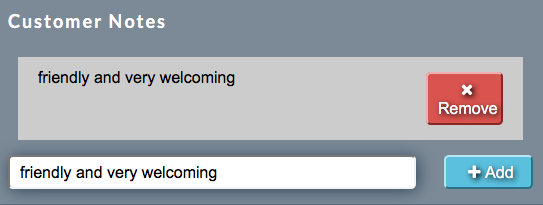
Moving back to the top of the page you have the option to add notes about your customer by typing your note and clicking add.
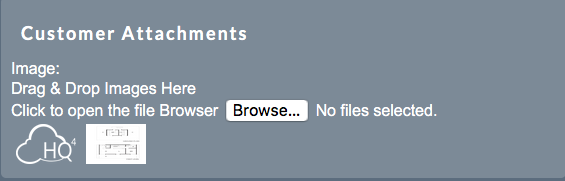
Just below your note you have the option to add images that you wish to associate with the booking. These can be anything from digital plans, to designs and even color samples.
You then need to select the category and the status from the list that you created earlier.

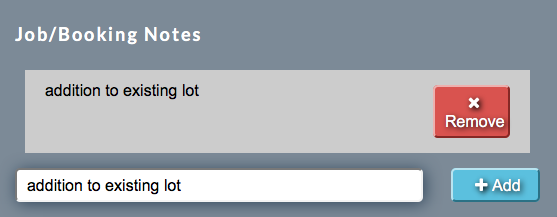
Under your category and status selection you then have the option to add notes regarding the job itself by typing in your notes and then clicking add.
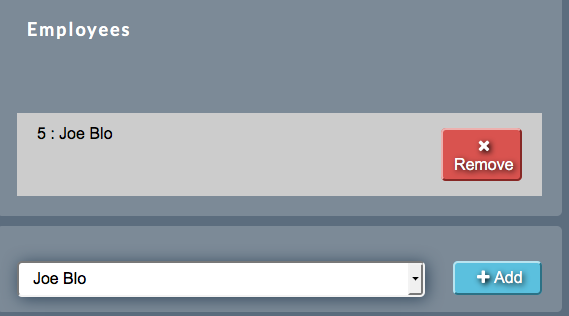
The final option is to add the employees that are available to complete the job. To add an employee simply select their name from the drop down box available. It is important to notes that only the employees that are available during the jobs time frame will be available for choosing. Once you have selected your staff simply click add.
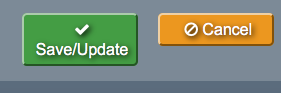
After you have completed all of the 10 options (or what is required) simply click save and update. Once your booking has been saved you will be taken to the calendar window where you can see your booking.
start/branch_admin/onlinebooking/createbooking_job.txt · Last modified: 2015/12/18 11:16 by 127.0.0.1