
Sidebar
Index
start:branch_admin:sensors:alerts
Alerts
In this tutorial I am going to show you how to set alerts for your controllers and sensors.
IT IS IMPORTANT TO NOTE THAT YOU MUST COMPLETE YOUR CONTROLLER AND SENSOR SET UP PRIOR TO ACCESSING THIS INFORMATION.
To begin click on the menu button located in the top left hand corner of your screen, followed by branch admin, followed by sensors and then followed by alerts.
Once on this page you need to move to the bottom of the screen and enter the required information. When setting alerts for controllers and sensors the process is similar however there are some differences.
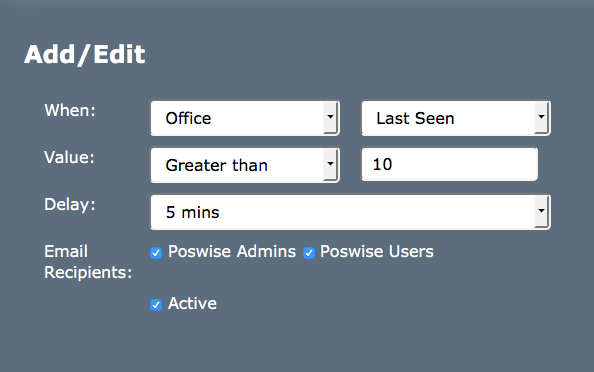
When setting an alert for a controller you simply need to select your required controller and in the box located to the right select the option entitled ‘last seen’. Below this information you then need to select a value ranging from ‘greater than’ to ‘not equal to’ and then enter the time that will trigger the alert. You will then need to select the recipients to which the alert will be sent to and ensure that the alert is active before clicking save. These selections therefore allow for an alert to be triggered once the HQOffice controller has been undetected for 10 minutes.
You also have the option to set a delay on the messages. This allows for the alert to be delayed for a specific amount of time before the initial alert is sent.
When setting up an alert for a sensor simply select the sensor you wish to create an alert for and in the box to the right you need to choose either ‘switch’ or ‘temperature’. Depending on the option that you choose the process will differ.
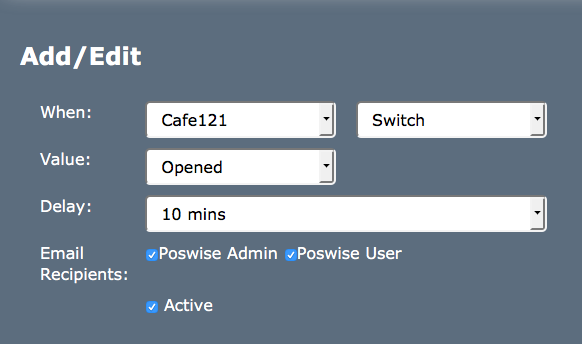
If you select the ‘switch’ option in the box below you are given the option to select either ‘open’ or ‘closed’. You will then need to select the recipients to which the alert will be sent to and ensure that the alert is active before clicking save. These selections therefore allow for an alert to be triggered when the switch on the sensor in Cafe121 is open.
You also have the option to set a delay on the messages. This allows for the alert to be delayed for a specific amount of time before the initial alert is sent.
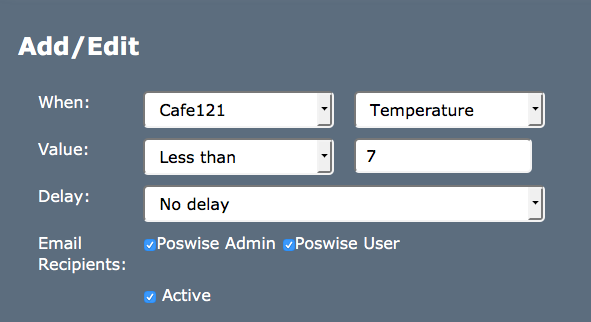
The second option when setting up the sensor is to select ‘temperature’. With this selection you then need to select an option ranging from ‘greater than’ to ‘not equal to’ and then enter the temperature that will trigger the alert. You will then need to select the recipients to which the alert will be sent to and ensure that the alert is active before clicking save. These selections therefore allow for an alert to be triggered once the Cafe121 sensor has reached a temperature below 7°C.
You also have the option to set a delay on the messages. This allows for the alert to be delayed for a specific amount of time before the initial alert is sent. If you do not wish to set a delay the alert select the option entitled 'no delay' and your alert will send at the desired time.
Once you have saved all of your alerts they will then appear at the top of your screen where you can edit or delete the information when required.

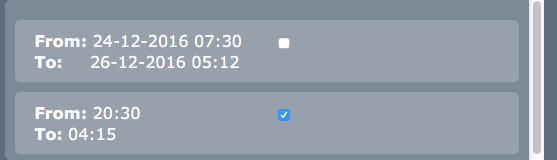
You are also given the option to set restrictions on times to send out your alerts. Setting these restrictions allows for alerts to be withheld during a specific time and date range.
To create this restriction simply click on the blue plus button on the right of your screen. You then need to select either 'date/time range' or 'recurrent time' and enter the times/dates that you required. Selecting 'date/time range' allows you to select time and dates throughout the year whereas 'recurrent time' only allows you to choose a time throughout the day.
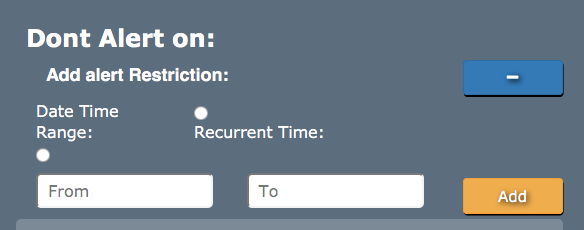
Once you have entered the restrictions simply click add and they will be saved to your system. To active your restriction simply check the corresponding box next to the restriction.
start/branch_admin/sensors/alerts.txt · Last modified: 2016/03/18 10:30 by 127.0.0.1