
Sidebar
Index
start:branch_admin:sensors:add_controller_to_cloudhq
Add Controller to CloudHQ
In this tutorial I am going to show you how to add controllers to your CloudHQ account.
Begin by logging into your CloudHQ account and click on the menu button located in the top left hand corner of your screen, followed by branch admin, followed by sensors and then followed by controllers.
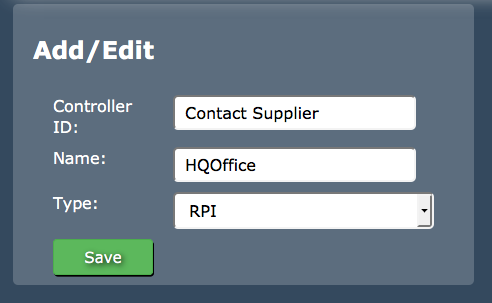
Once on this screen you then need to enter the controller ID given to you by your supplier. You then need to enter the name you have given to the controller during the controller configuration process. The final step is to enter the type of computer that will receive the information (eg- Windows, Mac) however this will be pre-set by the supplier. Once you have entered this information click save.
Your controller and the corresponding information will then appear at the top of your screen with the option to edit or delete information when required.

start/branch_admin/sensors/add_controller_to_cloudhq.txt · Last modified: 2016/01/29 23:11 by 127.0.0.1